Physical Address
304 North Cardinal St.
Dorchester Center, MA 02124
Physical Address
304 North Cardinal St.
Dorchester Center, MA 02124

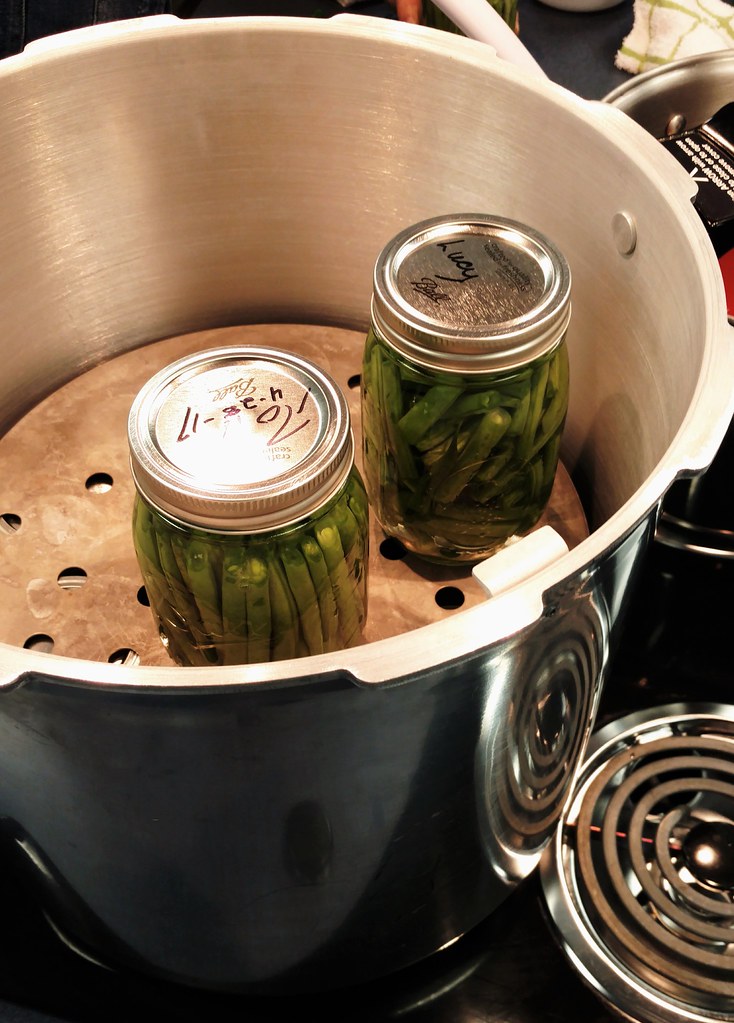
A pressure cooker is the key tool for sterilising grain and supplemented sawdust. Learn why 15 psi matters, dial vs weighted gauges, a step-by-step cycle, sterilisation times by load, altitude, and safety.
If you want to move beyond kits and grow mushrooms from grain spawn or supplemented sawdust, a pressure cooker becomes the most important tool in your kitchen. Boiling water can’t make grain or sawdust sterile. A pressure cooker or pressure canner can, because steam under pressure gets hotter than boiling water.
This guide explains why pressure matters, how to choose a cooker, and how to run a sterilisation cycle step by step. It borrows heavily from home canning guidance, because the equipment is the same and extension services have published clear, tested advice on using it safely.
At sea level, water boils at 100°C. That kills many microbes, but not the heat-resistant spores of some bacteria and moulds. Grain and supplemented sawdust are rich in nutrients, so any spore that survives will race your mushroom culture and often win.
Steam under pressure is hotter. Michigan State University (MSU) Extension notes that pressure canning is the only USDA-recommended way to process low-acid foods because they need to reach 240°F (about 116°C) or higher, a temperature at which “pressurized steam” destroys the bacterial spores that cause botulism. Mushroom growers aim a little higher still. In a 2023 study in Mushroom Research, Ufitinema and colleagues sterilised grain spawn bottles at 121°C and 15 psi, and The Mushroom Guide, published on Lowimpact.org, describes the goal as getting all of the grain to “121C/15PSI”. Penn State’s mushroom spawn lab also runs its rye spawn at 121°C.
If you are deciding whether a material needs full sterilisation or just pasteurisation, see our article on sterilisation versus pasteurisation. Straw and other low-nutrient materials are usually pasteurised. Grain and supplemented sawdust are sterilised.
The two terms are often used loosely. In general, a pressure canner is a larger pot designed to hold jars, with a gauge or weight to show and control pressure. A smaller kitchen pressure cooker is designed for cooking food quickly. For mushroom work, what matters is that it can reach and hold 15 psi and that it fits your jars or bags. The Mushroom Guide lists “a pressure cooker that can reach 15 PSI” as essential equipment for making spawn.
| Dial gauge | Weighted gauge | |
|---|---|---|
| How it shows pressure | A needle on a dial | A weight on the vent that rocks or jiggles when pressure is reached |
| Accuracy checks | Must be tested for accuracy every year, according to Oregon State University Extension | Doesn’t need testing, because it can’t go out of calibration |
| Settings | Any pressure the dial can show | Usually fixed steps, such as 5, 10 and 15 pounds |
| Best for | Seeing exactly what is happening inside | Simple, set-and-forget operation |
MSU Extension advises replacing a dial gauge that reads more than 2 pounds high. Oregon State notes that many extension offices will test a dial gauge for you.
Think about what you’ll be sterilising. A couple of quart jars fit in a modest cooker. Grow bags of sawdust or grain need a large canner. Bigger loads also take longer to heat through, as the table below shows.
The containers need to survive the heat and still let the mycelium breathe afterwards. The Mushroom Guide describes the common options:
Penn State’s spawn lab uses flasks plugged with cotton and covered with paper bags, while Ufitinema and colleagues used bottles plugged with cotton and covered with aluminium foil. If you’re new to spawn, our guide to growing oyster mushrooms is a good first project to use it on.
These steps combine the operating advice from MSU Extension and Oregon State Extension with mushroom-specific timings. Always read your own cooker’s manual first, because it overrides anything general.
| Load | Time at 15 psi | Source |
|---|---|---|
| A couple of grain jars | 60 to 90 minutes | The Mushroom Guide |
| Several small bags of grain | At least 2 hours | The Mushroom Guide |
| A cooker full of large bags | About 3 hours | The Mushroom Guide |
| 250 ml flask of rye grain (lab) | 35 minutes at 121°C | Penn State spawn lab |
| 1,000 ml flask of rye grain (lab) | 45 minutes at 121°C | Penn State spawn lab |
| Grain spawn bottles (research study) | 2 hours at 121°C, on two days in a row | Ufitinema et al. 2023 |
The wide range has a simple explanation. The Mushroom Guide notes that the centre of a bag can take a long time to heat up. Small lab flasks heat through fast. Dense bags of grain or sawdust heat slowly. If in doubt, go longer, and treat contamination as a sign that your cycle wasn’t long enough.
Water boils at a lower temperature as you go higher. The University of California’s Master Food Preservers explain that “as elevations increase, atmospheric pressure decreases, which results in water boiling at a lower temperature”, and their canning guidance raises the pressure on a dial gauge canner above 1,000 feet. For example, they give 11 pounds at 1,001 to 2,000 feet, rising to 15 pounds at 8,001 to 10,000 feet, while a weighted gauge canner is run at 15 pounds at all of these altitudes. These figures are for canning food, not for sterilising substrate. But the principle is the same: at high altitude, the gauge reading needed to reach a given temperature is higher. If you live well above sea level, check your cooker manufacturer’s guidance and lean towards longer cycles.
Once the jars or bags are cool, they need to be inoculated in a clean space. Our comparison of a still air box and a laminar flow hood explains your options. Work quickly, keep everything wiped down, and label each jar or bag with the date. Our guide to mushroom spawn explains what you’ll be making.
| Problem | Likely cause | What to try |
|---|---|---|
| Contamination appears in most jars within a few days | Incomplete sterilisation | Lengthen the cycle, vent fully before pressurising, and don’t overload the cooker |
| Contamination in only one or two jars | Contamination during inoculation | Improve your clean workspace and technique |
| Grain burst and mushy after cooking | Grain was too wet going in | Drain longer before loading. The Mushroom Guide warns that over-hydrated grain breaks apart in the pressure cooker |
| Cooker won’t reach pressure | Leaking gasket or lid not seated | Check and replace the gasket, and reseat the lid |
| Cooker ran dry | Not enough water for a long cycle | Add more water next time, and keep the heat low enough for a gentle rock |
If you keep seeing mould, our guide to contamination will help you work out what it is and where it came from.
Featured image: jars being loaded into a pressure canner, by Colorado State University Extension via Flickr (CC0 1.0).



[…] step-by-step guide to sterilising in a pressure cooker explains how to run the cycle safely. After sterilising, Ufitinema and colleagues shook their […]
[…] spawning: review your treatment time and temperature or pH, and your handling after treatment. Our pressure cooker sterilisation guide covers sterile handling habits that also help with […]