Physical Address
304 North Cardinal St.
Dorchester Center, MA 02124
Physical Address
304 North Cardinal St.
Dorchester Center, MA 02124

A beginner's guide to mushroom microscopy: what microscope to buy, the basic kit and stains, how to make a spore slide, calibrate your eyepiece and measure spores.
Many mushrooms can be named from their shape, colour, smell and spore print. But some can’t. Two red elf cups that look almost identical, or small pleated ink caps, can only be told apart reliably under a microscope. That’s when a microscope stops being a curiosity and becomes a tool.
This beginner’s guide covers what kind of microscope you need, the basic kit and chemicals, how to make your first spore slide, and how to measure spores accurately. It draws on guides written by experienced amateur and professional mycologists, plus university and CDC microscopy training material.
A microscope is an identification aid, not a safety test. Seeing spores under a microscope doesn’t make a wild mushroom safe to eat. If you forage, the usual rules still apply: never eat a mushroom unless an experienced local identifier has confirmed it.
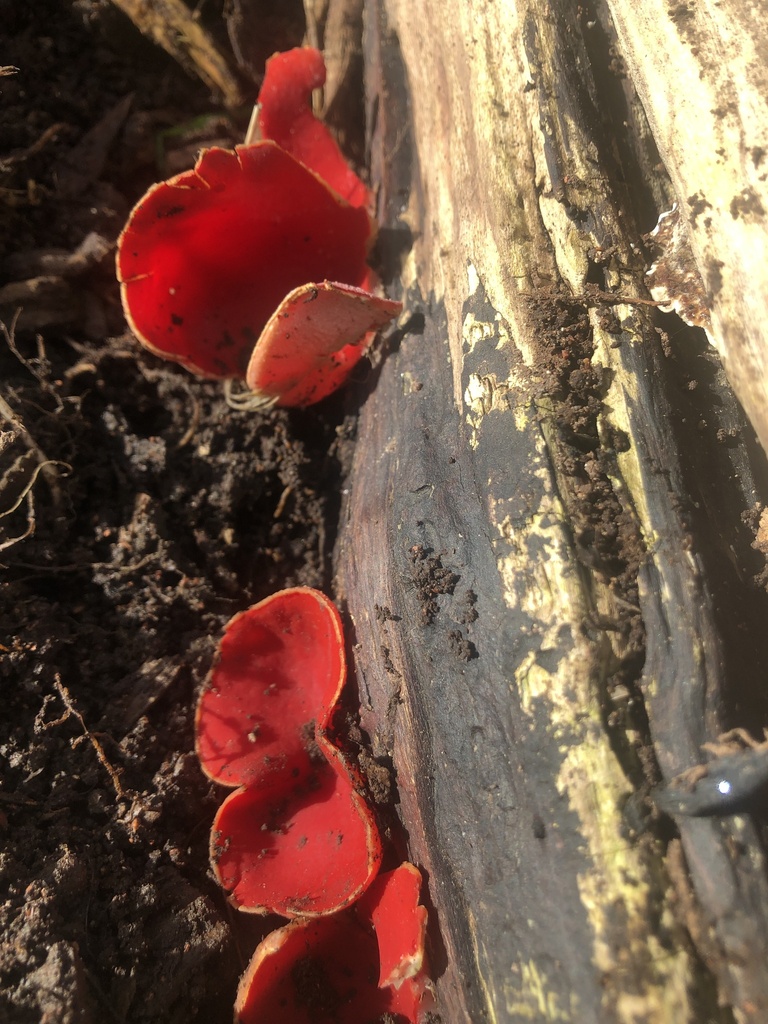
Some species pairs simply can’t be separated reliably by eye. A well-known example is the scarlet elf cup (Sarcoscypha austriaca) and the ruby elf cup (Sarcoscypha coccinea). According to Pat O’Reilly of First Nature:
| Feature | Ruby elf cup (S. coccinea) | Scarlet elf cup (S. austriaca) |
|---|---|---|
| Hairs on the outer surface | Tiny and uncoiled | Coiled, like a corkscrew |
| Spore ends | Always rounded, without buds | Some spores bud at the ends, giving a “hammerhead” look |
| Spore size | 26 to 40 x 10 to 12.5 µm | Overlaps with S. coccinea, with broader spores |
Notice that the spore sizes overlap. That’s common, and it’s why mycologists look at several features rather than relying on one.
You need a compound microscope, the kind with a stage and several objective lenses, not a low-power stereo or “dissecting” microscope. Michael Kuo of MushroomExpert.com and Pat O’Reilly agree on the essentials:
Toy microscopes are usually too weak, though Kuo notes that large features, such as morel spores and the sacs that hold them, may be visible with one. In his 2019 guide, he wrote that a new microscope under $400 would not be a good one, and suggested looking for a used instrument from a well-known maker, such as Nikon, Olympus, Zeiss or Leica. He suggests asking university or college life science departments. O’Reilly adds that second-hand bargains exist but may come without handbooks, and that specialist suppliers will often let you try models.
If you want to take photos, O’Reilly suggests a trinocular microscope, which has a third port for a camera.
| Item | What it’s for | Notes |
|---|---|---|
| Glass slides and coverslips | Holding the sample | Kuo says glass coverslips give a better view than plastic, but break easily |
| Single-edged razor blades | Cutting thin sections | Kuo warns that double-edged blades are flimsy and dangerous |
| Stage micrometer | Calibrating your eyepiece scale | A slide with a precise scale printed on it |
| Immersion oil | Used with the 100x oil objective | Needed only at the highest power |
| Lens tissue | Cleaning lenses | Follow your microscope maker’s instructions |
| Fine tweezers and a dropper | Handling samples and liquids | Keep a separate set for microscopy |
You put a drop of liquid on the slide to hold the sample. Different liquids show different things:
KOH and ammonia are alkalis. Leonard’s advice is to keep alkalis off the top of the coverslip and away from the lens, and never to mix Melzer’s reagent with an alkali, as a cloudy precipitate forms immediately. O’Reilly warns that ammonia fumes can burn the eyes, and he keeps his chemicals, blades and slides locked away from children. Follow the safety information supplied with each product.
A spore slide is the easiest place to start. Spores from a spore print are mature, which matters for accurate measurement. Kuo’s method:
O’Reilly describes a quicker route: place a cap, gills down, directly on a slide for “an hour or two”, then add liquid and a coverslip. Don’t leave it longer, he says, or spores pile up too thickly.
If you have no spore print, Kuo suggests crushing a small piece of mature gill under a coverslip. If you find no spores, the mushroom may be too young.
Leonard’s procedure is to focus with a low-power lens first, add one drop of oil to the coverslip, then swing in the 100x lens and bring it slowly into focus. Leonard’s key warning: once a slide has oil on it, don’t go back to a dry lens, as you may damage the lens. Wipe oil off the objective with lens tissue when you’ve finished.
Your eyepiece scale has no units until you calibrate it. Training material from the CDC notes that calibration should be done separately for each objective lens, and for each microscope. Dr Stephen Saupe’s method from the College of St. Benedict and St. John’s University is:
Kuo gives an example. If one eyepiece unit equals 1.07 micrometres (µm) at your highest power, a spore that spans 10 units is about 10.7 µm long. One micrometre is a thousandth of a millimetre.
Once you’re comfortable with spores, Kuo’s guide explains how to look at other structures. These include basidia (the cells that produce spores), cystidia (sterile cells on the gills) and the cap surface, called the pileipellis. These need thin sections cut with a razor blade. O’Reilly warns that you should expect more failures than successes at first. Local fungus groups, he adds, can help you set up and calibrate your microscope.
Microscopy can help you understand a mushroom, but it’s not a shortcut to deciding whether it’s edible. Dangerous species such as the death cap are identified using many features together. Our guides to true and false morels and wild vs cultivated mushrooms explain why caution matters. If you’re in any doubt, don’t eat it.
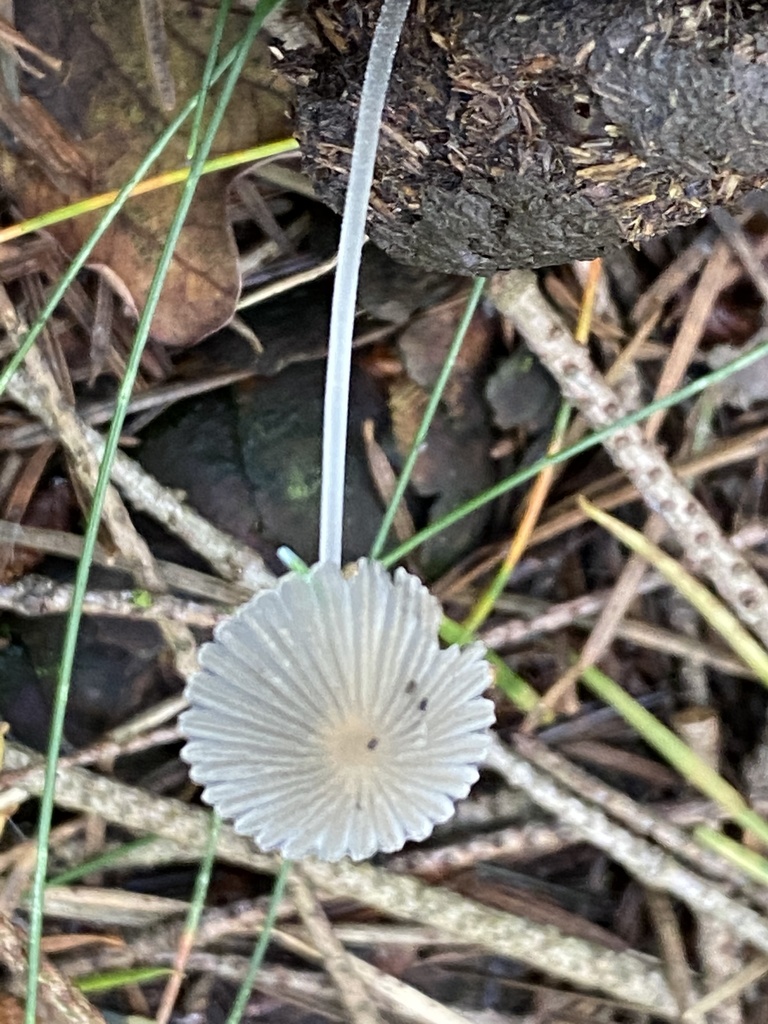
Featured image: elf cups (Sarcoscypha sp.) by childrenswood via iNaturalist (CC0 1.0). Inline photo by Jean-Paul Boerekamps via iNaturalist (CC0 1.0).

[…] gill edges and textures that are easy to miss. If you get hooked on identification, our guide to mushroom microscopy for beginners is the next step. For many species, a spore print made at home is also an essential […]